3-Step Ombré Glow!

Caroll Alvarado
| 30-12-2025
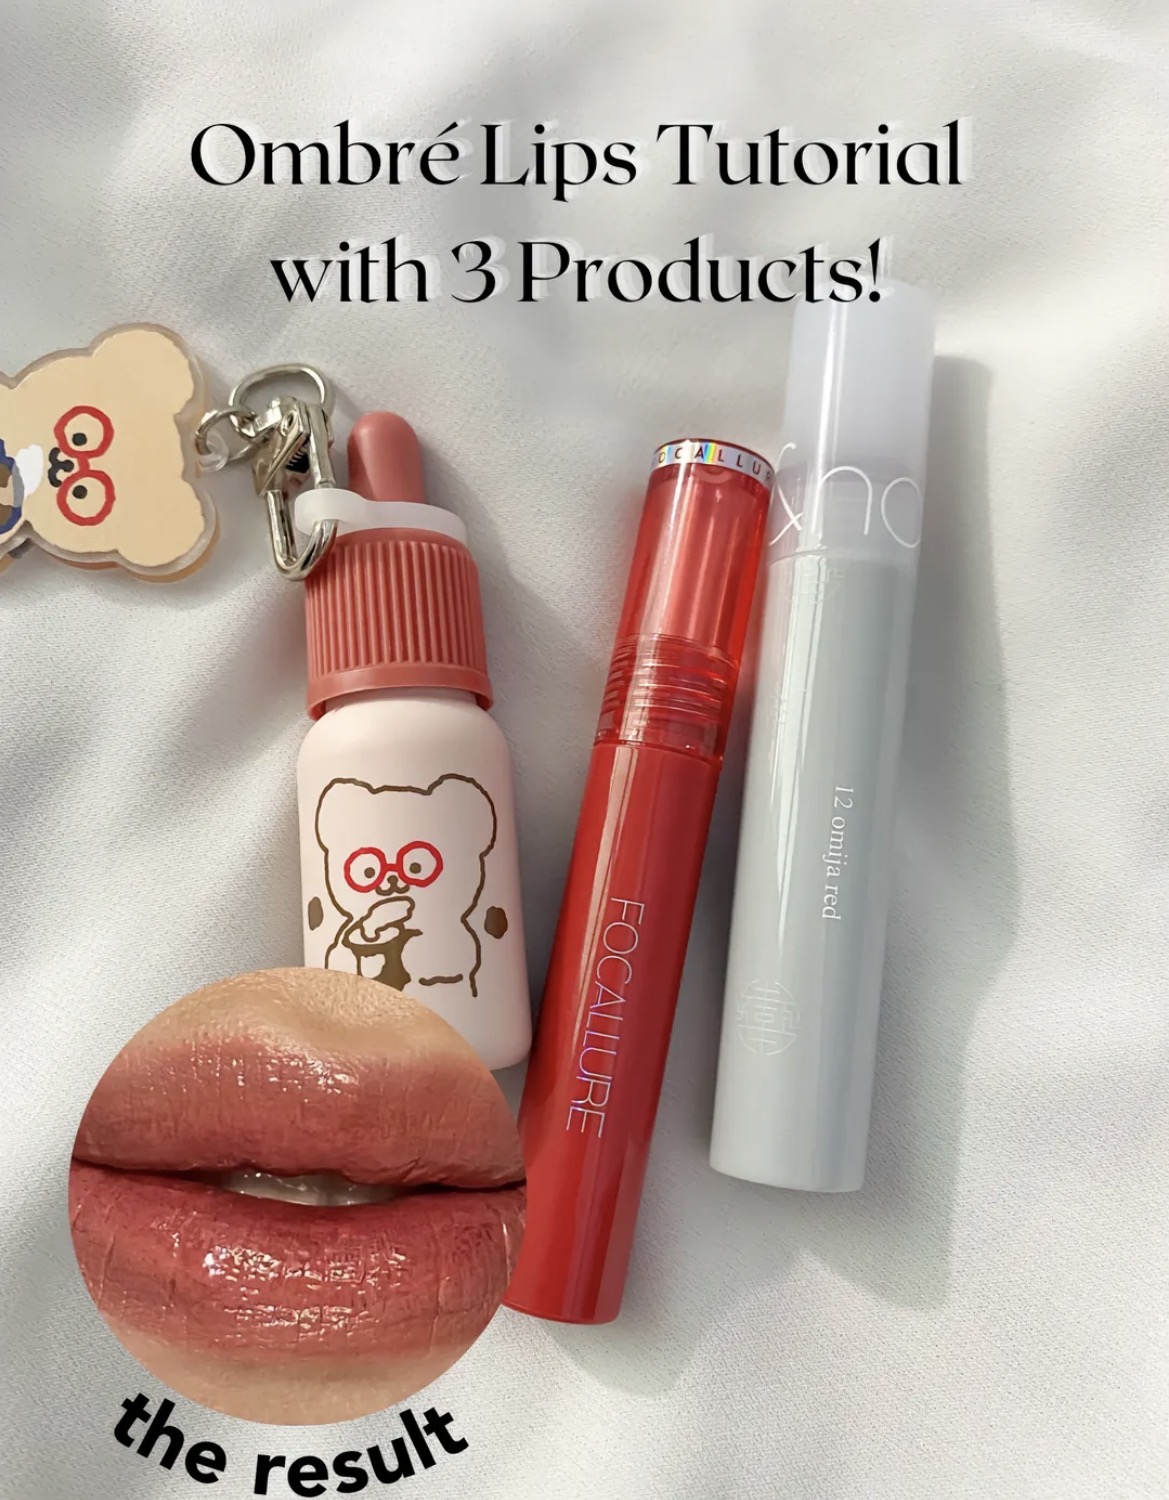
Ombré lips are one of my favorite ways to make the lips look soft, full, and effortlessly pretty.
They might look complicated, but the truth is, this style is super beginner-friendly when you break it down into simple steps. Here’s my easy, no-stress version using only three products!
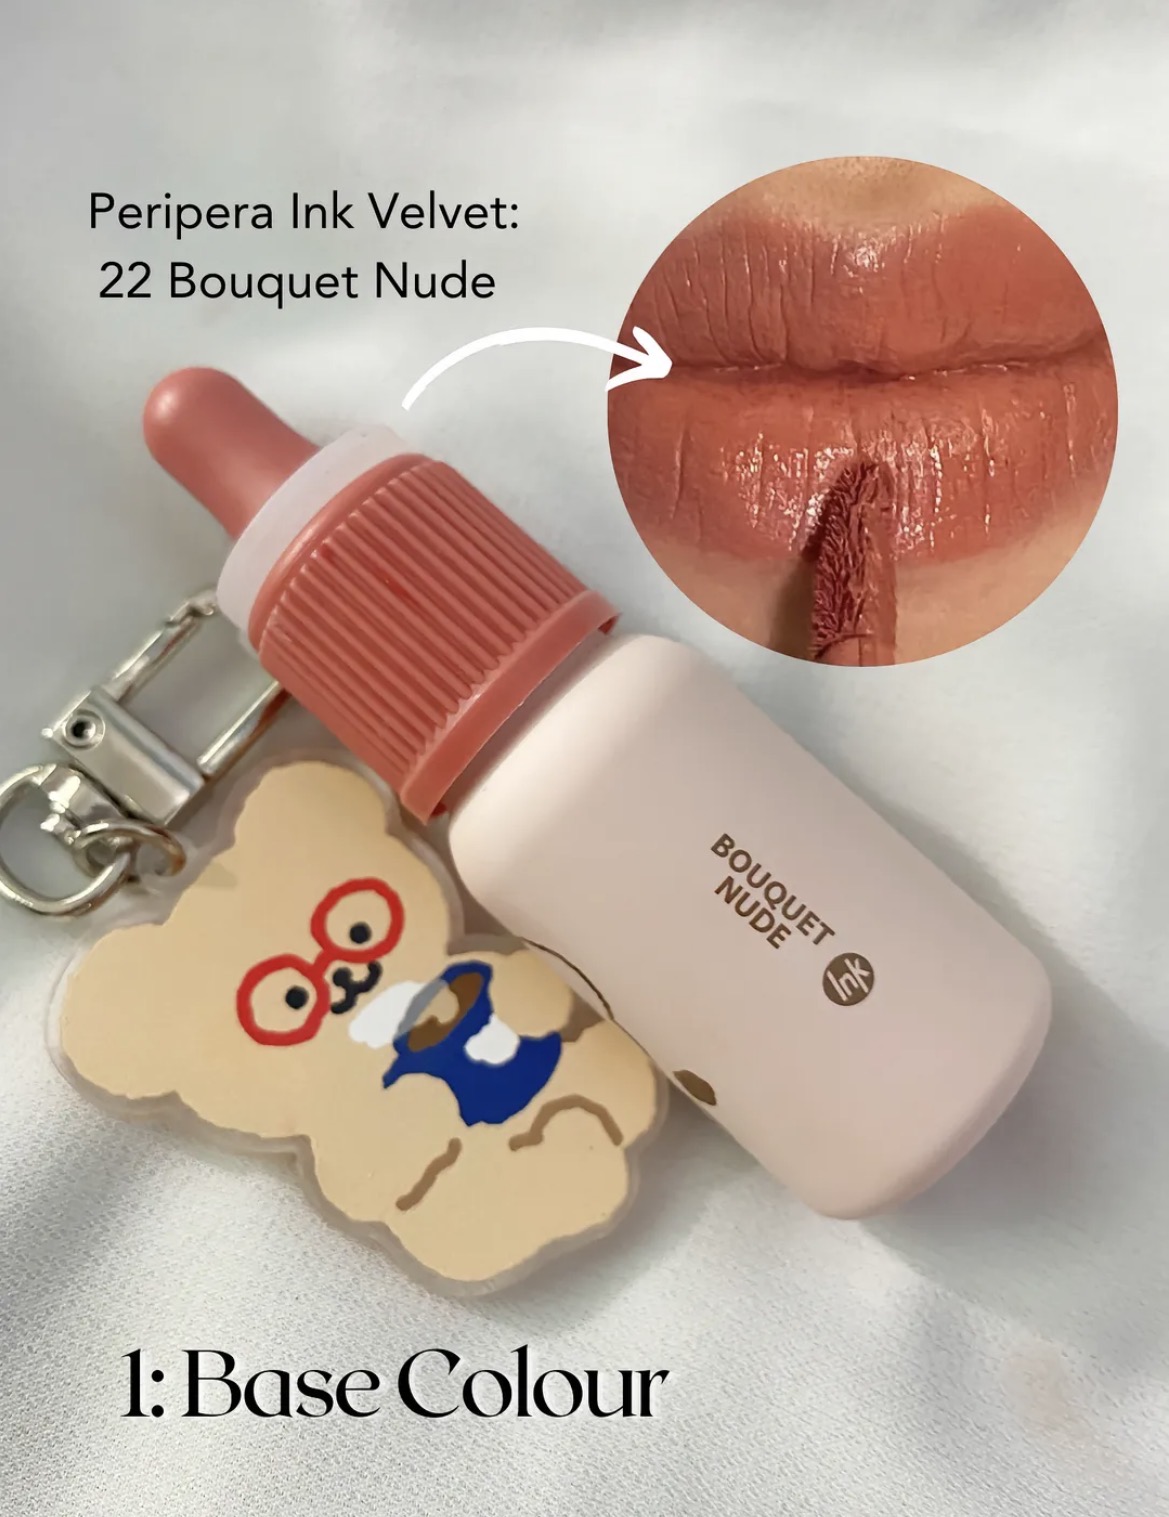
1. Base Color – Create a Clean Canvas
I start by applying Peripera Ink Velvet. Since my lips are naturally pigmented, this step helps tone them down and creates a softer base so the other shades stand out more. Think of this as erasing the lip color just enough to let the ombré effect shine. For naturally pale lips, this step can be skipped without any issues.
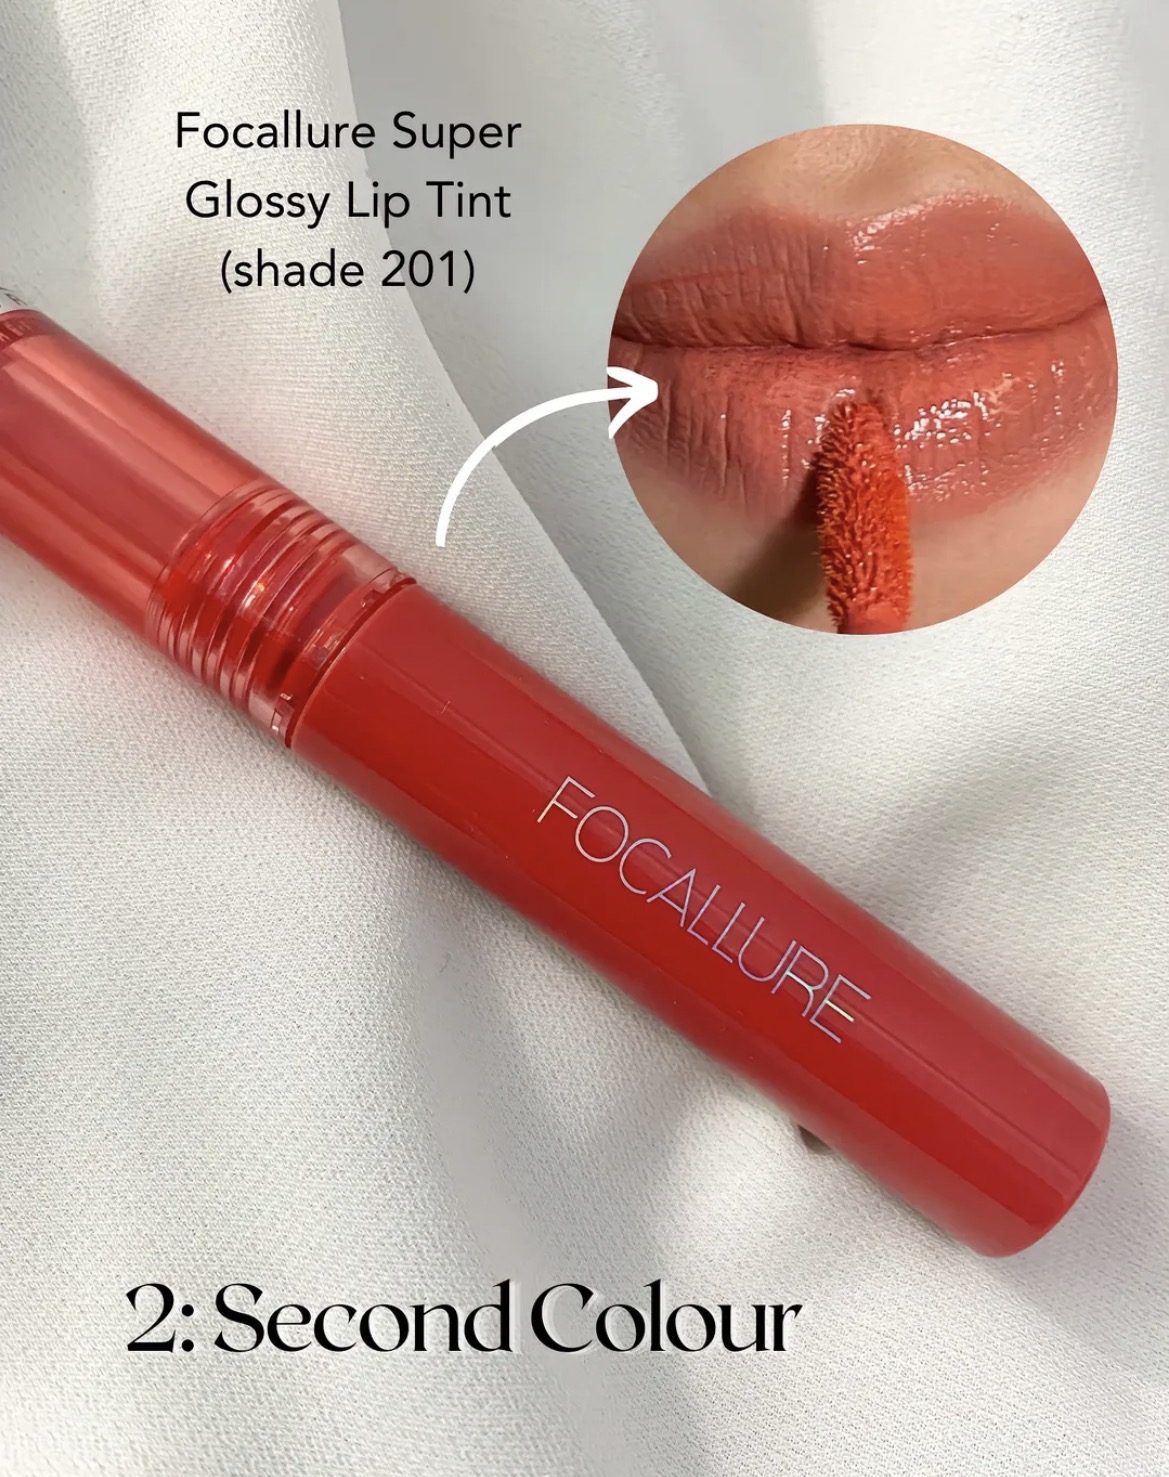
2. Transition Color – Add Shine and Soft Blend
Next, I apply Focallure Super Glossy Tint in shade 201 slightly toward the inner part of the lips. This shade acts as the bridge between the base and the center color. It also adds a glossy finish that makes the lips look healthy and plump. The shine helps everything melt together smoothly, so there are no harsh lines.
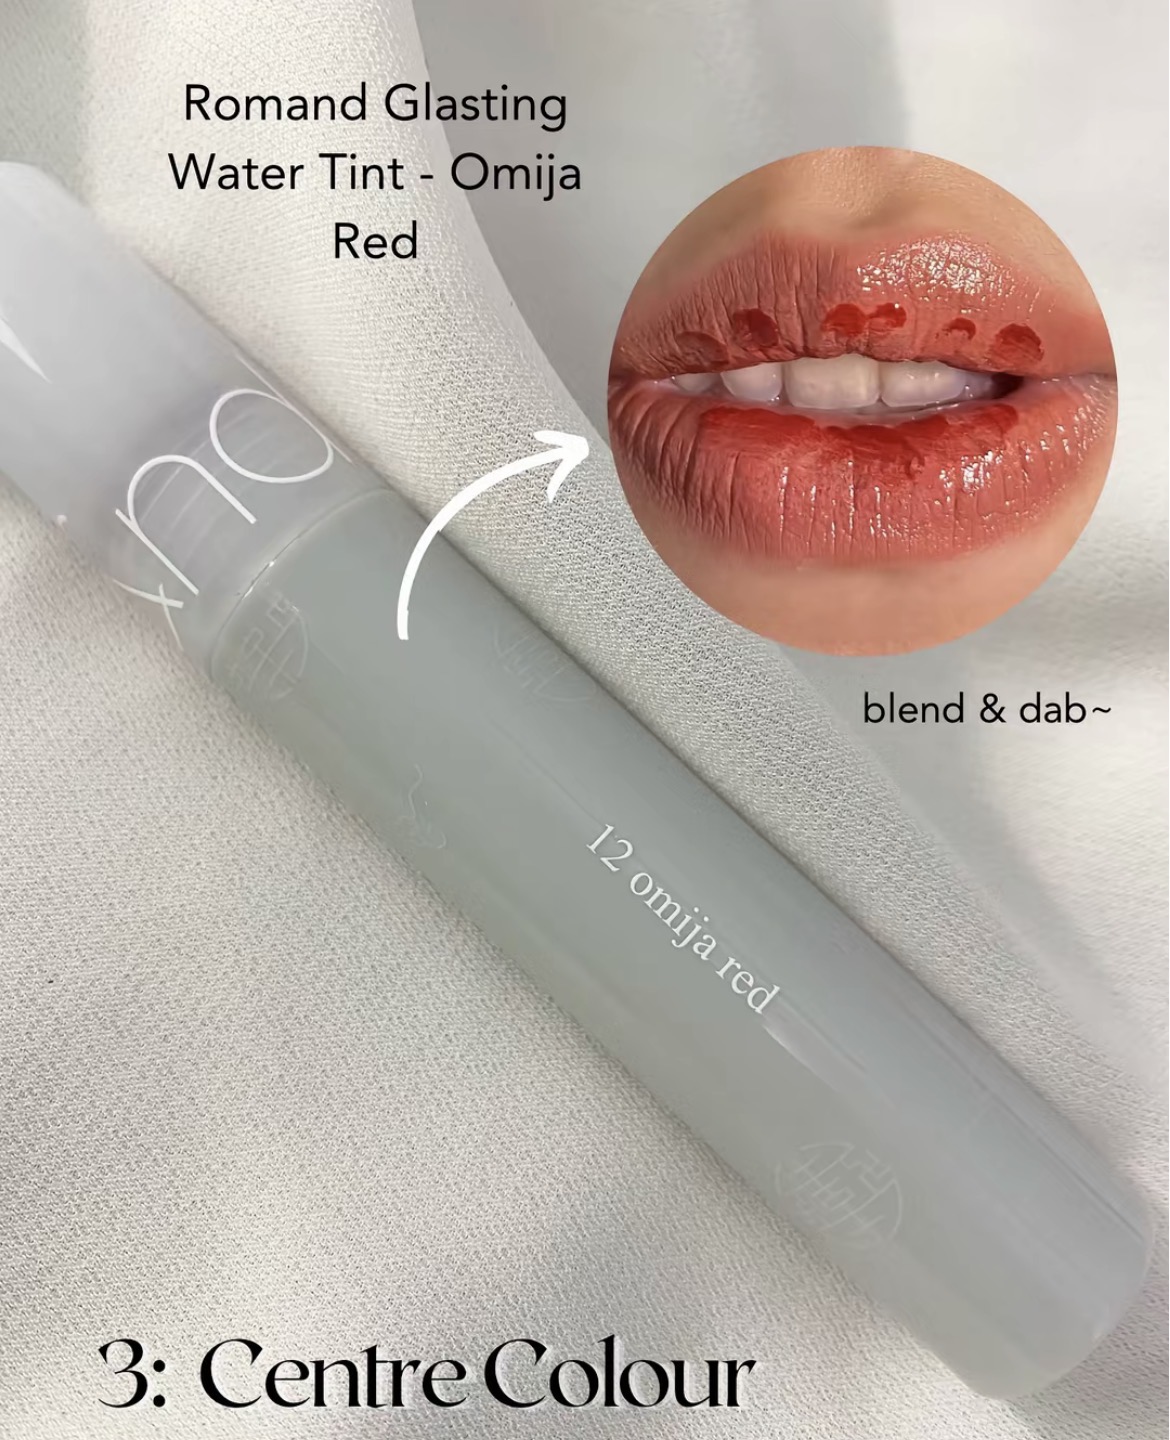
3. Center Color – Bring in the Drama
For the final touch, I dab Romand Glasting Water Tint in Omija Red right in the center of my lips. A little goes a long way here. Gently tap it out using your finger or a lip brush until it blends seamlessly into the transition shade. This step gives that signature ombré depth and makes the lips instantly eye-catching.
That’s it—three products, three steps, and a gorgeous ombré lip that looks polished yet effortless. This technique is perfect for everyday wear or when you want something soft but still impactful. Once you try it, you’ll see how easy it is to customize with your favorite shades and finishes!